|
|
How To Install A Drip Irrigation System With An Automatic TimerIt took an afternoon to install the system, which takes up some of your valuable time, but once it is installed it pays dividends. Not only do I feel great looking sitting on my deck looking at my healthy watered plants, but I also feel pretty good knowing that I don't have to lift a finger to water them. That's the beauty of a drip irrigation system, once it's installed you don't have to worry about watering your plants. This year I'm going to install a drip irrigation system for a plant in that back of the yard that needs a lot of water and it looks like the neighboring trees are sucking up all of the water. With this system I will be able to provide water right to the roots of the plant. What We Purchased:For watering two hanging baskets we purchased the following pieces from Home Depot:
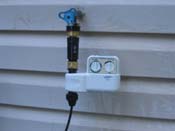
What Is Each Piece For:The backflow preventer ensures that water will not flow back into your main water system. The pressure regulator ensures the water pressure going into the sprinkler timer will be no greater than 25 PSI. It will not increase the pressure to 25 PSI just reduce it to PSI. This is a great protection device and I highly recommend getting one. The sprinkler controller is the main piece that automatically controls the watering of your flowers and plants. We purchased a simple timer but you can purchase more elaborate sprinkler timers that have LCD displays, multiple zones and start times. To set up the Orbit Sprinkler Controller we just needed to follow these simple steps: - Remove the waterproof cover - Set Dial B to “OFF” - Set the interval on Dial A, we selected Daily - Set the duration on Dial B, we selected 15 minutes You will want to play with the settings to determine the best settings for your watering needs. The ¼ inch drip irrigation tubing, tubing tee connector and adjustable mist sprayer all deliver the water to your plants. The tee connector allows you to add an additional nozzle to the system. If you have more than two baskets or planters you will need an additional tee connector and nozzle for each additional basket or pot you have. The ¼ inch clamps were used to attach the tubing to the side of the deck and you may not need these for your system. Drip Irrigation System Design and Installation:When designing your drip irrigation system you need to know the following: - How close is the outside tap from your baskets - How many baskets are you watering - How often do you want to water the your flowers Once you know this information you can determine how much irrigation tubing you need, how many tee connectors and nozzles you need and how elaborate of a sprinkler controller you should purchase.
For the second we attached the mist sprayer onto the end of the tubing. So you will need to measure the distance from your outside tap to farthest away plant and then tubing runs from the connector to the nozzle. Once you add this up you will know how much irrigation tubing you need to purchase. I like to add on 10% extra just in case you need a bit more or you make a mistake. I also like to have a bit of slack while I’m running the tubing. You can usually purchase the tubing in 100 foot and 500 foot rolls. Steps to Setup the Entire System:
Note, because my tap is located so close to the house I found it much easier to connect the entire assembly before I connected it to the tap. Once the system is installed it is time to program the installer. Follow the manufacturer’s instructions for programming the sprinkler timer and then turn on the tap. Once the system is working like you want you can attach the tubing to your deck with the clamps if like and also cut the tubing down to size. I also attached the mist sprayer to the hanging basket with tie wraps. We were able to complete this project in less than one day, which was very cool and very satisfying project. If you want to learn more about drip irrigation, please read this article on the drip irrigation materials and tubing. |
|
|||||||||||||||
|
|||||||||||||||||
|
|
|||||||||||||||||


 For our system we ran the tubing from the controller to the first plant and
then to the second plant. For the first plant we added in a tee connector and
then ran the tubing from the connector to the mist sprayer.
